The weather is starting to get cool in my neck of the woods and with the drop in temperatures, my children are starting to ask for new cold weather accessories. I came up with this scarflette for my 3 year old daughter.


She is always moving at warp speed, it seems, and she always wants to do everything by herself. So, I didn't want to make her a long scarf that she would struggle with wrapping around her neck or a scarflette with buttons because I'm not sure she'd slow down enough to button it herself or to let me help :)


Bow:
1: Make a slip knot and leave a beginning tail of about 8", ch 9, turn sc in the 2nd ch from hook and each across (8 sc). This pieces measures about 2.5" across.
2: Ch 1, turn, sc across (8 sc).


Materials needed:
• J/6.00MM crochet hook
• Hobby Lobby I Love This Yarn! in two colors- Used here: Turquoise & Peacock
• Tapestry needle for sewing in the ends
Gauge:
• 6 hdc= 2 inches
Abbreviations:
• ch= chain
• sc= single crochet
• hdc= half double crochet
• sl st= slip stitch
Finished size:
• Scarflette= 6.5" by 22" before it is sewn and folded
Scarflette:
1: Ch 26, turn, hdc in 2nd from hook and each across (25 hdc).
1: Ch 26, turn, hdc in 2nd from hook and each across (25 hdc).
2: Ch 1, turn, hdc in each across (25 hdc).
Repeat row 2 until you reach your desired length. Leave a long tail (about 3 feet) for sewing the scarflette and finish off.

I wanted mine to snuggly fit on my 3 year old's neck, but also to fit over her head so she can pull it on easily. I checked periodically while I was making it and the length that fit nicely was about 22". You can adjust this however you see fit to make the scarflette fit how you want it to fit.
Since I wanted this to be really easy for my child to put on, I decided (instead of buttons) to sew the bottom edges together. Then, all she would have to do is pull it over her head and she would be all set to go. You could always use buttons along the bottom edge if you do not want to sew it together. Just make sure your buttons can fit in-between the hdcs and still secure the scarflette.
Here is how I sewed mine together-
First lay your scarflette out, then fold the right side down.

Next, fold the left side down so that the points from both sides meet at the bottom.

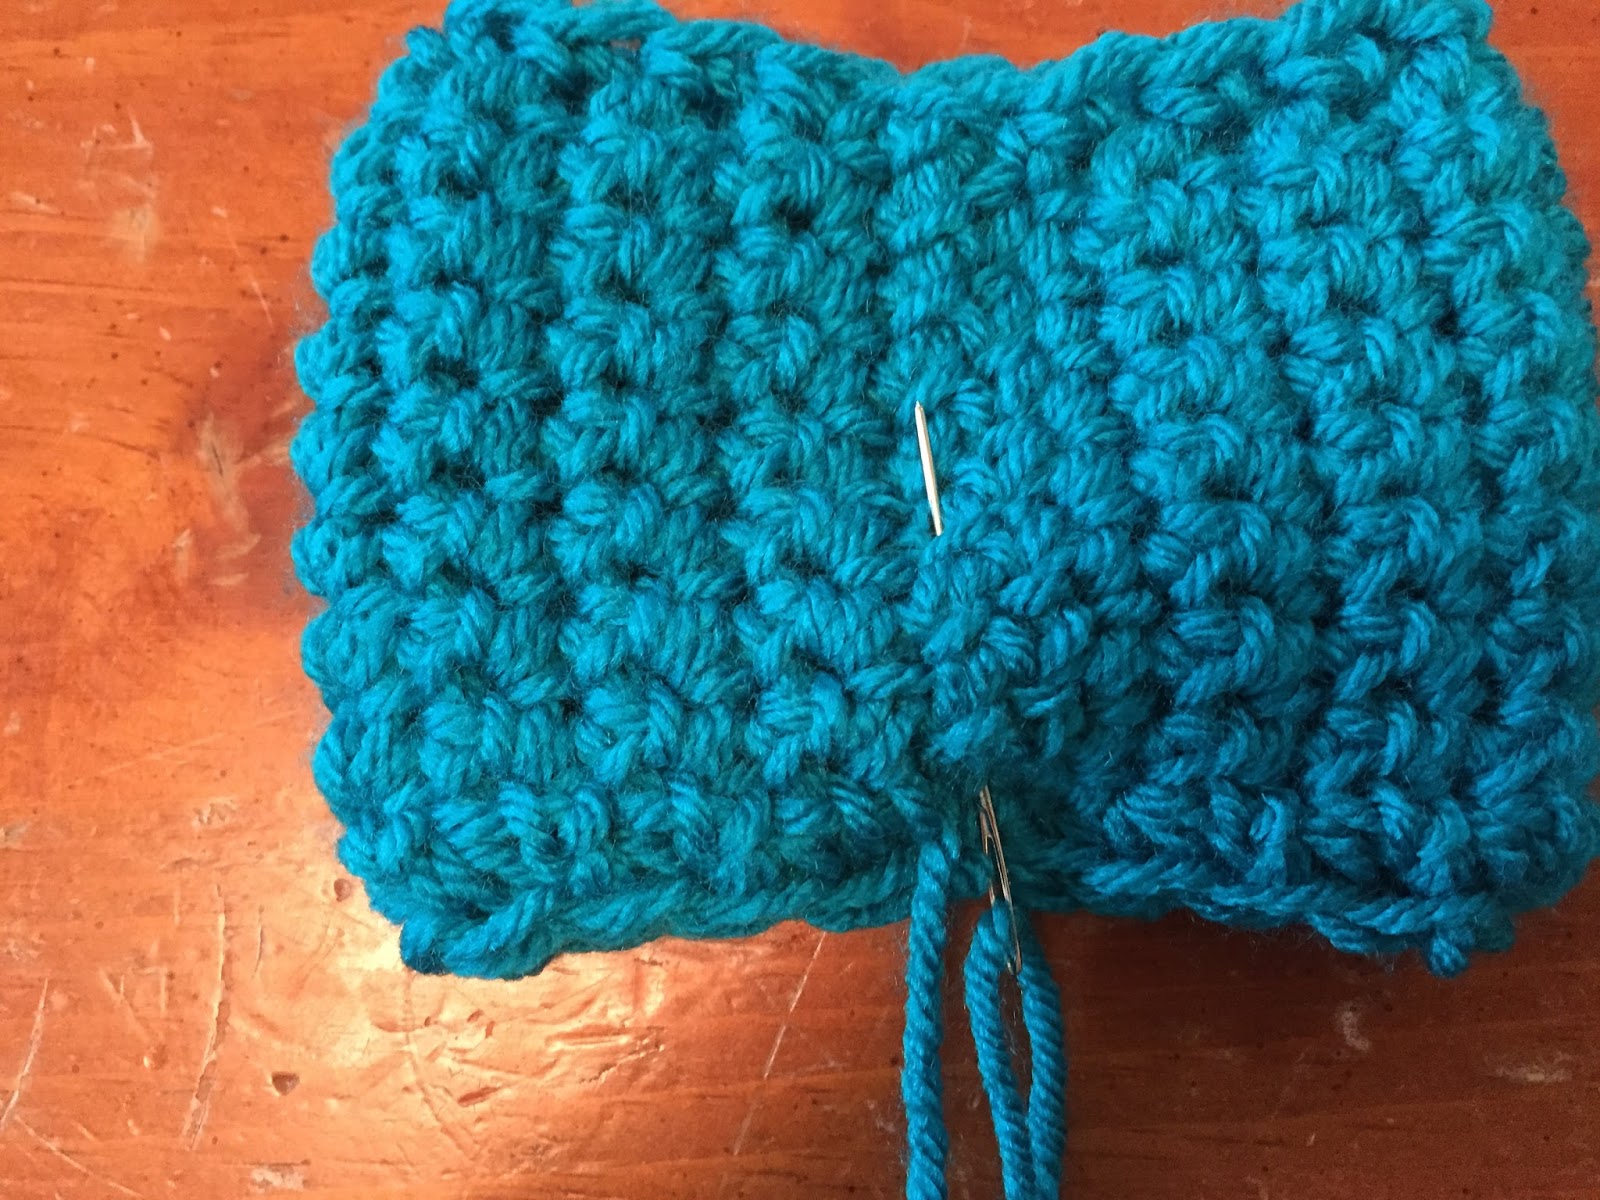
Now you will use the long tail to sew the scarflette. You may want to secure the scarflette with some pins to hold it in the correct position while you sew.
Start sewing along the side shown above at the arrow. I used a running stitch here. It seems to blend right in with the hdcs.
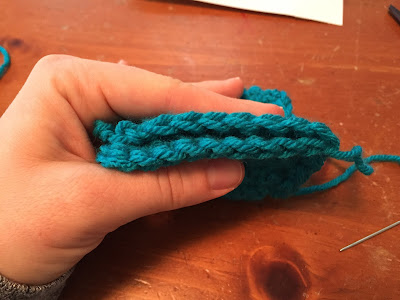
Stop a little short of the top to allow for some stretch when pulling over the head. I stopped where my fingers in the picture below. It is about 1.5-2" from the edge.

Move to the other side and use a running stitch down this side. When you get to the edge, whipstitch along the bottom to secure the bottom edge and the continue up, using a whipstitch to secure the last edge.
 When you are finished, weave in all of the ends and finish off.
This is the front-


Move to the other side and use a running stitch down this side. When you get to the edge, whipstitch along the bottom to secure the bottom edge and the continue up, using a whipstitch to secure the last edge.

This is the front-

This is the back-


Bow:
1: Make a slip knot and leave a beginning tail of about 8", ch 9, turn sc in the 2nd ch from hook and each across (8 sc). This pieces measures about 2.5" across.
2: Ch 1, turn, sc across (8 sc).
Repeat row 2 until the piece measures about 8-8.5" long.

Then ch 1, sc in the same space and sc around the entire piece, beginning down the first long side and continuing around to where you started, making (sc, ch1, sc) in each of the corners as you go around. Then finish off leaving a long tail (about 15 feet).


Then ch 1, sc in the same space and sc around the entire piece, beginning down the first long side and continuing around to where you started, making (sc, ch1, sc) in each of the corners as you go around. Then finish off leaving a long tail (about 15 feet).

Using the beginning tail that you left when you started the piece, whipstitch the short ends together.


Then thread you needle with the beginning of the long tail, weave the needle in and out of the center of the bow (along your whipstitch line), making sure to go through both sides the bow.

 Do this back and forth a few times, then pull on your tail (the part that is in the bow) to cinch the bow a little.

Now use the rest of your long tail to wrap around the cinched area to complete your bow.

 Leave enough to secure the bow to the scarflette. When you have about 12" left, flip to the back side of the bow, make a few knots in the back to secure the center of the bow.

Then use the rest of the tail to attach the bow to the scarflette.


Now use the rest of your long tail to wrap around the cinched area to complete your bow.


Then use the rest of the tail to attach the bow to the scarflette.

She loves it!

Skein and Hook Copyright © 2014
The pattern and photographs contained in this document are the property of Skein and Hook. This pattern is available for personal use only. This pattern may be printed for your personal use only. You may not in any form copy, redistribute, sell, or represent this pattern or photos as your own.
Please do not copy this post and claim it as your own. Please do not republish photos from this post and claim them as your own.
You are welcomed to sell the items that you make from this pattern- please just credit me as the designer with a link to this post.
Comments
Post a Comment