
Gooseberry Picnic Quilt


In the beginning of this summer, I decided that I wanted to enjoy lots of family picnics this summer.  My girls love eating outside and sitting on top of a blanket on the ground has even more appeal to them then eating at a picnic table.  In the past we grabbed whatever crocheted blanket was around and took it with us.  But, I decided that a dedicated picnic blanket would be better for us.  And also I think it would make for special memories and nostalgia to use the same blanket every time we picnicked.  

We have 6 people in our family- my husband and I and our 4 kids.  So, I new this needed to be somewhat big so that we could all comfortably sit and enjoy a meal.  

I settled on Gooseberry by Lella Boutique for the fabric.  This fabric reminded me of my childhood and I think it is so, so beautiful. 

I thought over patterns for a while and ended up using this one.  The tutorial by Missouri Star Quilt Company was awesome to follow and I loved how April used layer cakes instead of charm squares.  


It came together quickly, which was great since I wanted to use this right away.


I decided to make it 3 large broken dishes blocks by 3.  The finished size was 76" x 76".

I love how the top turned out.  It is so bright and pretty.  Here is my husband trying to hold it up for a picture :) pretty good try on his part.


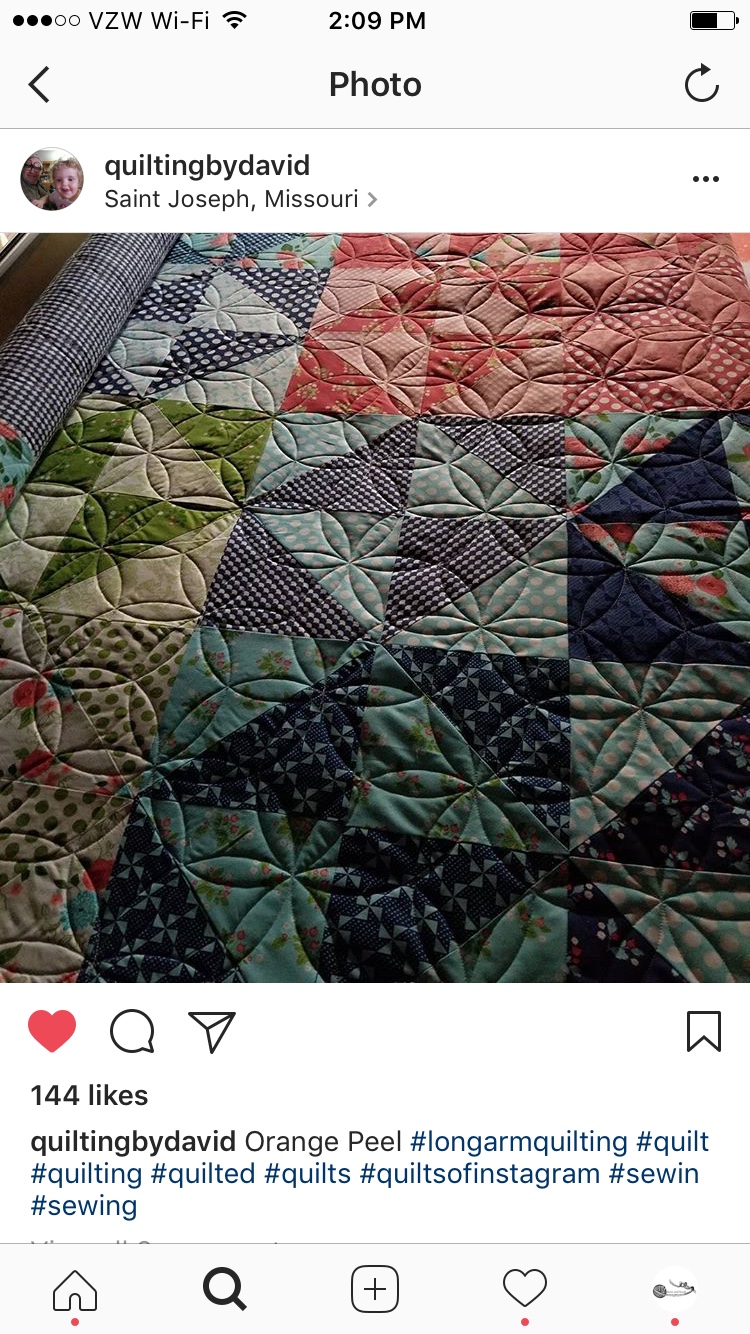
Then I sent it to Quilting by David for quilting.  This was the first time I ever sent a quilt out for quilting and I was really excited about it.  Well, David did not disappoint.  I chose the Orange Peel quilting design.  David posted this progress picture-


I was so excited to see it and couldn't wait to get it back!


I settled on the pink and red polka dot binding and got to it as soon as it came back.  This was also the first time I hand bound a quilt.  In th past, I usually did machine binding but I was really excited to try something new.  I watched this tutorial from Missouri Star Quilt Company and felt pretty confident to start working on the binding right away.  I do enjoy hand sewing so I really enjoyed hand binding and I think I'll bind my quilts like this from now on. 

As soon as I put the last stitch in the binding, my sewing buddy got really cozy and took a nap :)


Here is how it looks all finished.


I love it so much!  I can see many happy family picnics on it in our future :)   I have made a bunch of things to go with this picnic quilt and I can't wait to share those projects with you soon!  


Comments

Popular posts from this blog

Tutorial: How to Add a Zipper to a Crochet Pouch

I have been crocheting tons of pouches lately and I love lining them with a coordinating fabric and finishing them with a zipper.  I'm not an expert at sewing by any means, but this method works for me.  I use it every time and I am always happy with the results.  I hope you enjoy this tutorial! In the pictures shown in this tutorial, I am lining the Lee Change Purse .  But, this method will work for any pouch...just adjust the fabric and zipper sizes. Materials needed- for the fabric lining & zipper (if desired): • 5" zipper • Fabric- 2 pieces that are roughly 5" high by 6"wide •Needle & thread •Sewing machine (optional) •a few ball head straight pins Finished size: • Lee Change Purse- 4" high by 5" wide Making the Lining: 1. Cut out 2 pieces of fabric that are about 1/2-inch larger around than your pouch. 2. Lay one piece of the fabric, right side up, on your worktop.  Place the zipper, right side up, on top of t

Free Crochet Pattern: Emerson Car Seat Cover or Baby Blanket

I love the concept of car seat covers/canopies.  When you use a regular blanket instead, it is always falling off and you are constantly picking it up off the ground.  A car seat cover covers and protects your baby for cold weather, rain, snow, bright sun, you name it and it hooks on the handle bar so it ALWAYS stays in place!  I absolutely love it and if you have a baby in an infant seat, you NEED to make one of these to see how great it is. PLEASE REMEMBER, it is dangerous to have your baby covered up in their car seat for long periods of time.  This cover is NOT meant for that.  This cover is only meant to be used when you are walking from your house to your car, store to car, school to car, and the like...it is meant to protect your baby from rain, snow, strong wind as you are walking from the places mentioned above.  It is not meant to be left on the car seat when you are driving, sitting somewhere, going to a long walk or stroller ride, or anywhere else for longer than a minut

Free Crochet Pattern: Valentine's Day Headbands

I made these adorable Valentine's headbands for my daughters.  For three free crochet headband patterns and how I made them, see below! I saw the cutest heart headband floating around Pinterest and decided to make one for each of my daughters.  The tutorial for the heart headband is here and the original heart pattern is here . But instead of using an elastic headband, I decided to use a crochet one.  I made some of these last year for my girls to wear at Easter and they turned out well so I was excited to make more. Here are my hearts: For the red one, I used Vanna's Choice yarn in Scarlet with a K hook.  For the darker pink, I used Red Heart Soft Baby Steps in Strawberry with an I hook.  For the lighter pink, I used Vanna's Choice yarn in Pink with a G hook. All of the headbands begin the same way.  If you are using 2 hair ties you have to join them together before you start joining the yarn onto the hair tie. If you are using one hair tie, you can beg